Category: storage solution

  • How to Organize Storage Bins With QR Codes: A Complete Guide

    How to Organize Storage Bins With QR Codes: A Complete Guide

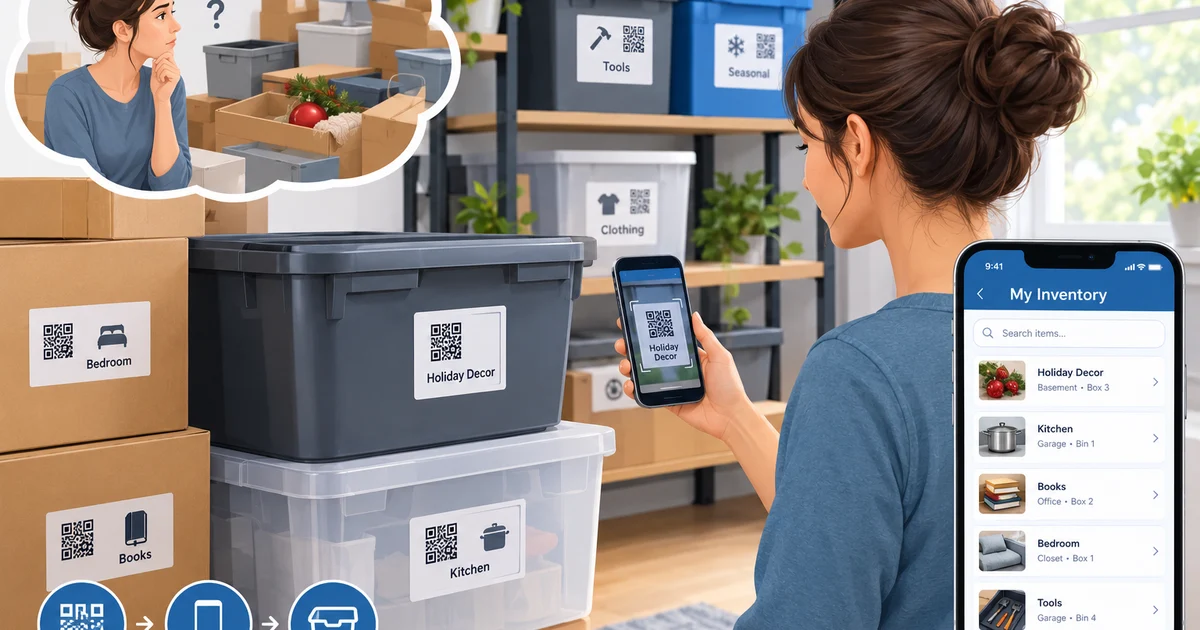
    If your garage, closet, or storage unit is filled with identical plastic bins and you can never remember what’s inside without opening every single one, you’re not alone. This is one of the most common organization problems people face — and one of the easiest to solve with a small shift in approach. Instead of relying on memory, sticky notes, or vague handwritten labels, more households and small businesses are turning to QR code storage labels to build a searchable, scalable system for their bins.

    This guide walks through exactly how to set up a QR-code-based organization system for storage bins, step by step, along with the reasons it works better than traditional methods.

    Why Traditional Bin Labeling Falls Short

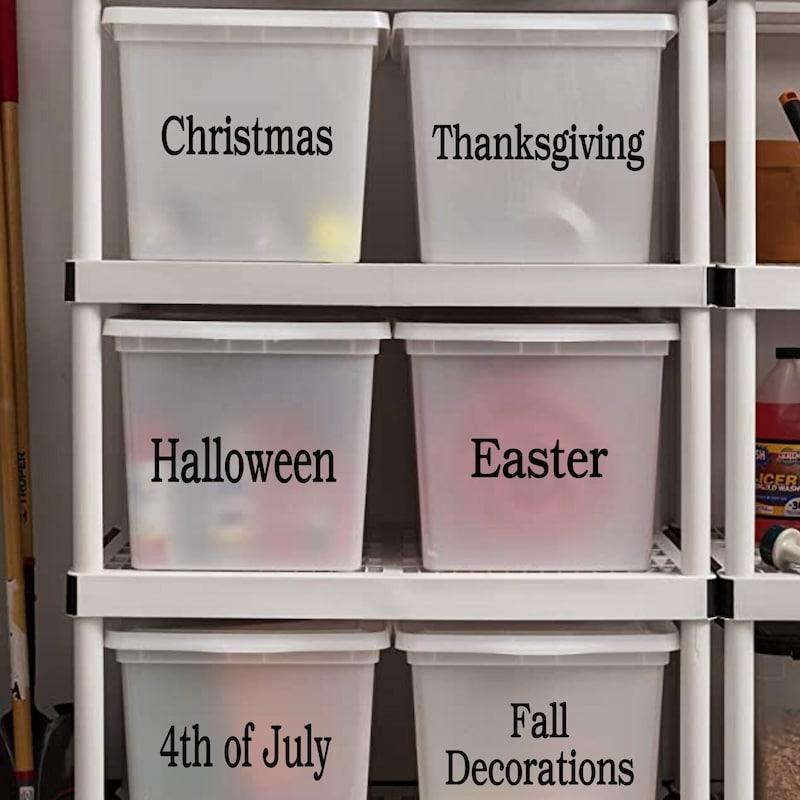
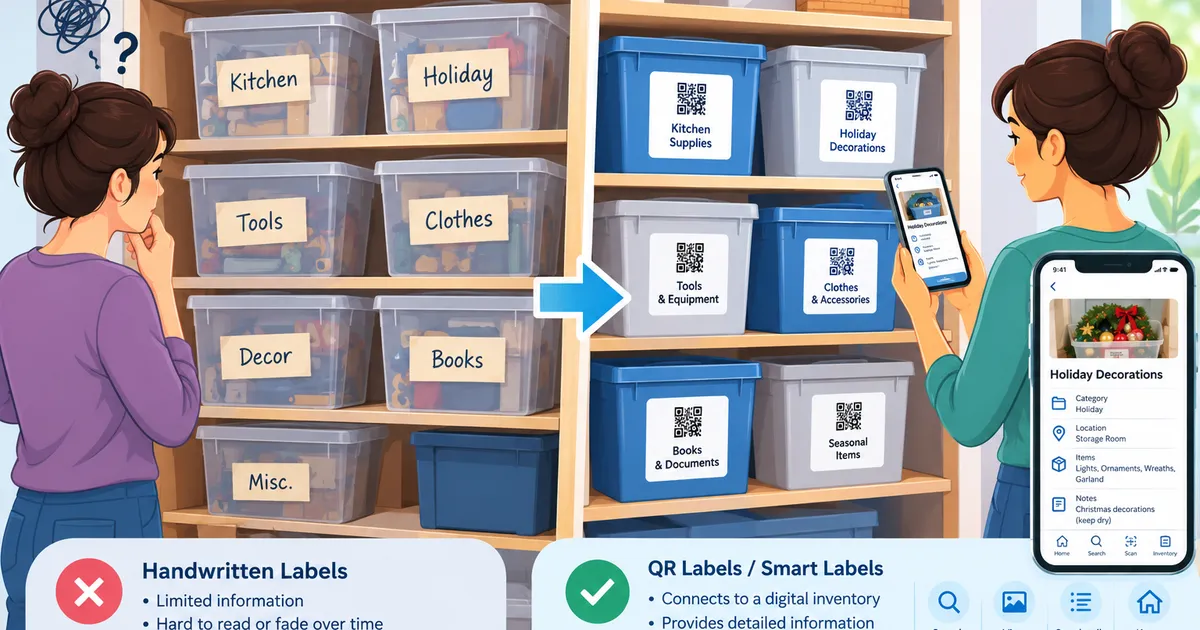
    Most people start with good intentions: a marker, some masking tape, and a plan to label everything neatly. The problem shows up months later. Ink fades. Tape peels. Bins get restacked, and the label facing outward is no longer accurate. Worse, a handwritten label can only hold a few words — “kitchen stuff,” “kids’ toys,” “cables” — which rarely tells you what you actually need to know when you’re searching for something specific.

    The core limitation is that a written label is static. It cannot be updated without physically replacing it, and it cannot be searched. If you have more than a handful of bins, you end up doing what most people do: opening lids one by one until you find what you’re looking for. That’s not organization — that’s just guessing with extra steps.

    What Makes QR Code Storage Labels Different

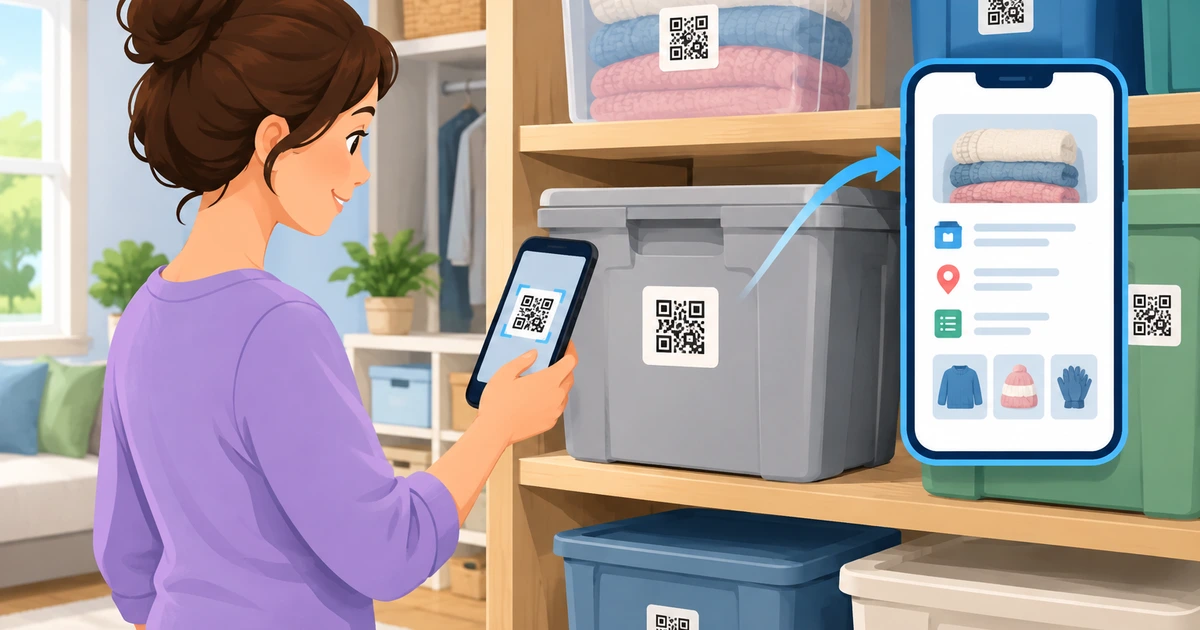
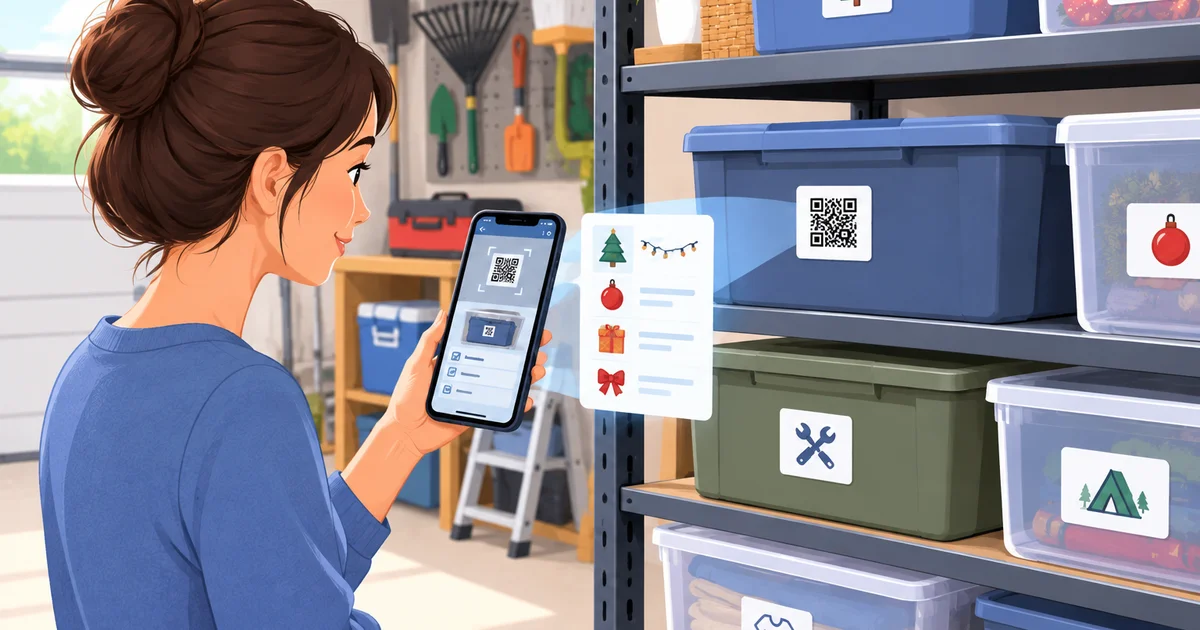
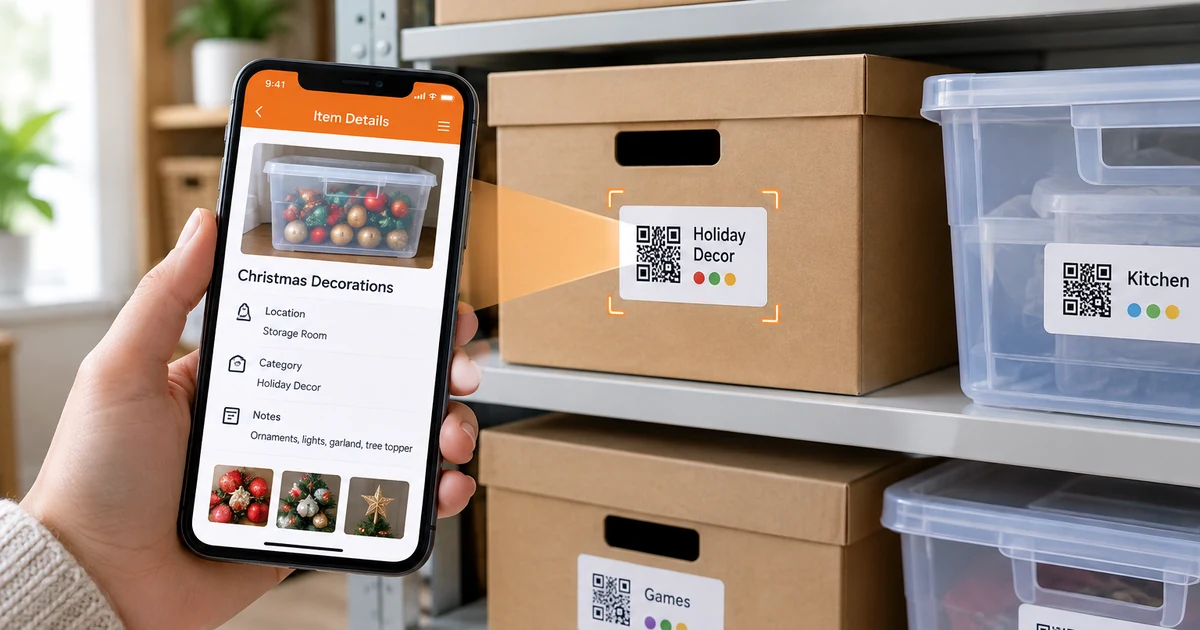
    A QR code label solves this by separating the physical label from the information itself. The label on the bin doesn’t need to say much — it just needs to be scannable. All the actual detail lives in a digital record connected to that code, which you can update anytime from a phone, without ever touching the sticker again.

    This means a single small QR code on a bin can link to:

    • A list of everything inside
    • Photos of the contents
    • Notes about condition, quantity, or location
    • Keywords and categories for searching later

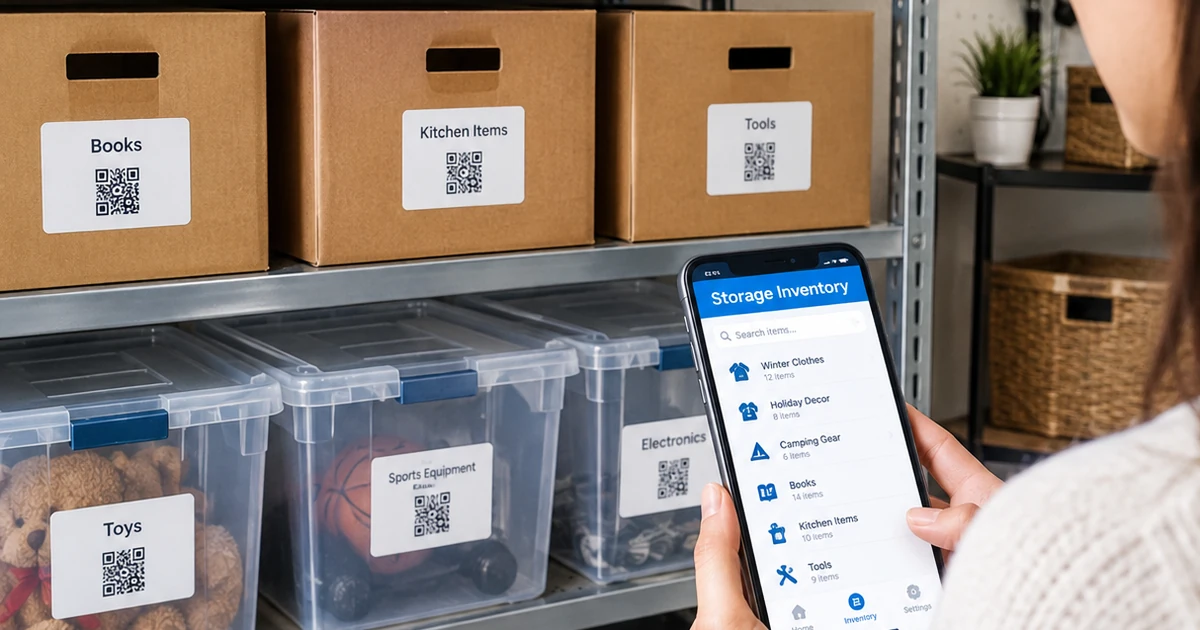
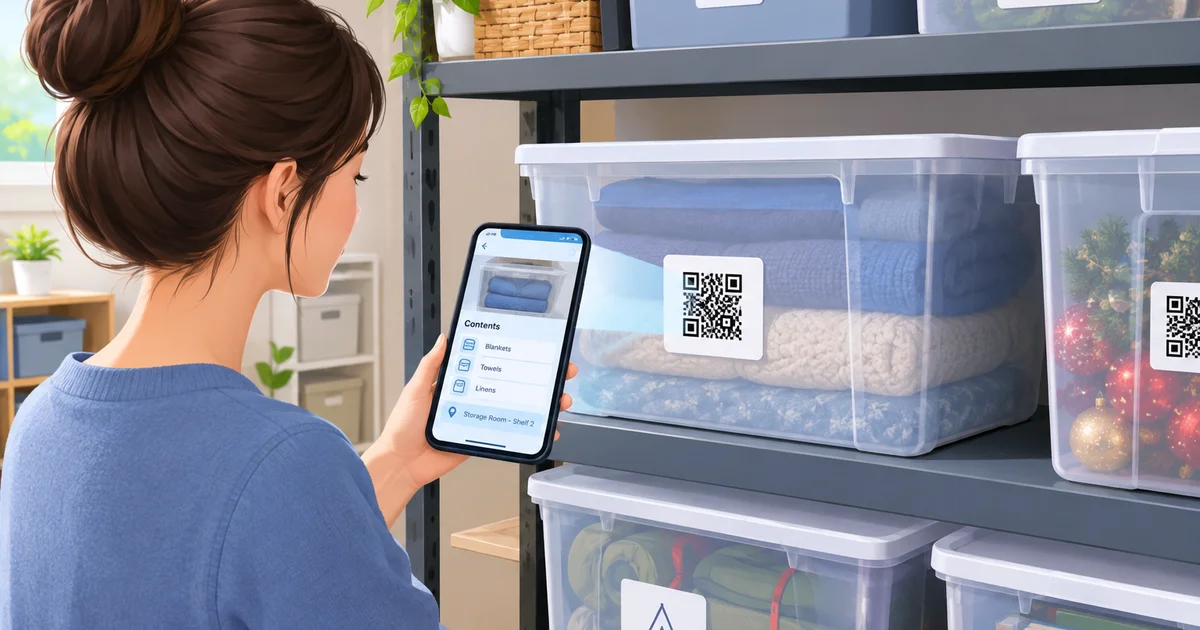
    Instead of remembering what’s in bin #14, you scan it and see the full contents instantly. Instead of digging through a stack of bins in a storage unit, you search a keyword on your phone and get pointed to the exact one you need.

    Step 1: Sort Before You Label

    Before any label goes on any bin, take the time to actually sort your items into logical groups. This sounds obvious, but it’s the step most people skip, and skipping it undermines everything that follows. Group items by:

    • Room or area (kitchen, garage, office)
    • Season (holiday decorations, summer gear, winter clothing)
    • Frequency of use (daily items vs. long-term storage)
    • Category (tools, electronics, documents, sentimental items)

    A QR code system only works as well as the organization behind it. Scanning a code that opens to a vague, disorganized list defeats the purpose.

    Step 2: Choose the Right Bins

    Uniform, stackable bins make the biggest visible difference in a storage space. Clear or semi-clear bins help with quick visual checks, but even opaque bins work perfectly well once QR labels are involved, since you’re no longer relying on seeing through the plastic to know what’s inside.

    When choosing bins, consider:

    • Size consistency, for easier stacking
    • Weather resistance, if stored in a garage, basement, or shed
    • Weight limits, especially for bins holding books or tools

    Step 3: Apply QR Code Storage Labels to Each Bin

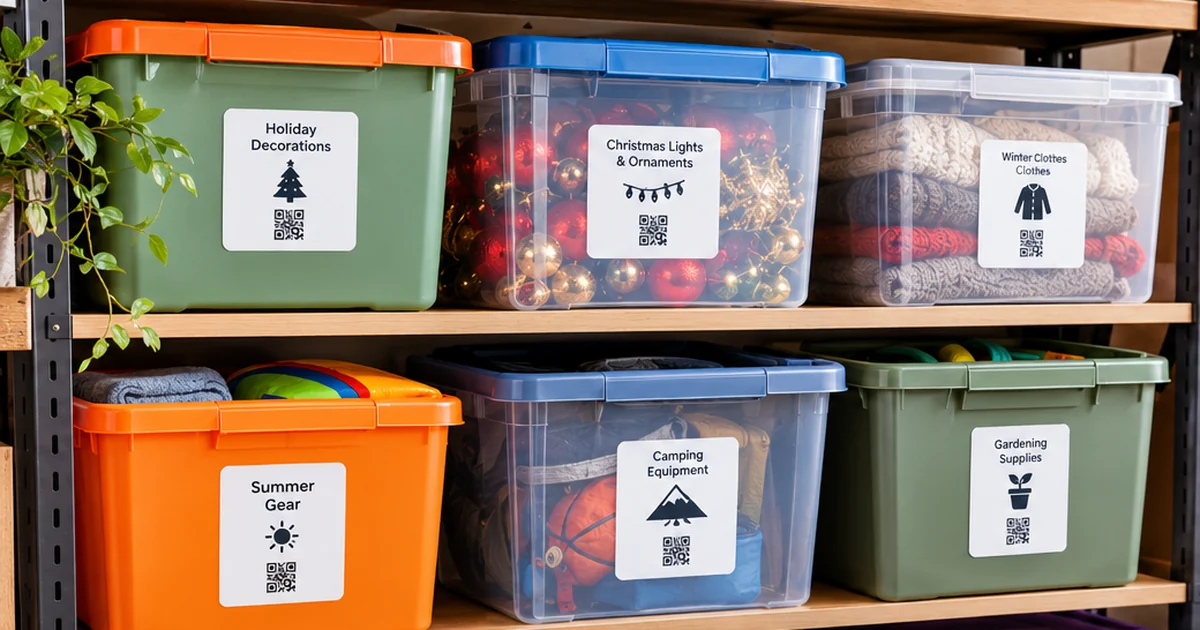
    Once bins are sorted and filled, apply a QR code label to a consistent, visible spot on each one — typically the short end or top, so it stays scannable even when bins are stacked. Consistency in placement matters more than people expect; if labels end up in random spots, you’ll waste time hunting for the code itself.

    For labels to hold up long-term, look for ones that are:

    • Water-resistant, so moisture doesn’t degrade the code
    • Made of durable material like vinyl, which resists tearing
    • Coated for scratch resistance, since bins get moved and stacked repeatedly

    Step 4: Build the Digital Record for Each Bin

    This is the step that makes the entire system worthwhile. As each label goes onto a bin, take a few minutes to populate its digital entry with:

    • A short description of the contents
    • Photos, especially for bins with mixed or less obvious items
    • Keywords you’re likely to search later (for example, “extension cords,” “winter boots,” “tax documents 2023”)
    • The bin’s physical location, if you have multiple storage areas

    This step takes a little longer upfront than a quick handwritten label, but it’s where the real time savings come from. Every future search benefits from the effort spent here once.

    Step 5: Keep the System Updated

    The biggest reason organization systems fail over time isn’t the initial setup — it’s neglect. Bins get repacked, items get added or removed, and if the digital record isn’t updated to match, the system slowly becomes unreliable, just like a handwritten label would.

    Make it a habit to update a bin’s digital entry any time you significantly change its contents. Because QR code storage labels separate the physical label from the data, updating is quick: open the app, edit the entry, and the physical label never needs to be touched or replaced.

    Best Practices for Long-Term Success

    A few additional habits make a QR-based storage bin system even more effective:

    Use consistent keywords. If you tag one bin “holiday decor” and another “Christmas stuff,” searching becomes inconsistent. Pick a naming convention and stick to it across every bin.

    Best Customer Review video here : https://www.youtube.com/watch?v=7tyL2YB5Sb

    Group by zone, not just category. If you have multiple storage areas (garage, attic, storage unit), tag each entry with its location so search results also tell you where to go, not just what’s inside.

    Do periodic audits. Every few months, spot-check a handful of bins against their digital records to catch anything that’s drifted out of sync.

    Involve household or team members. If others share the space, make sure they understand how to scan and update entries too, so the system doesn’t rely on just one person’s memory.

    Why This Approach Scales Better Than Manual Labeling

    The real advantage of QR code storage labels over handwritten alternatives shows up as the number of bins grows. With five bins, almost any system works. With fifty, only a searchable digital system remains fast and reliable. Storage bins organized this way turn a physical search-and-guess process into a quick digital lookup — which matters just as much for a home garage as it does for a small business managing inventory or a nonprofit organizing donated supplies.

    Final Thoughts

    Organizing storage bins doesn’t have to mean memorizing what’s in every container or digging through boxes to find one item. By sorting thoughtfully, applying durable QR code storage labels, and maintaining an updated digital record behind each code, you build a system that stays accurate and searchable no matter how much storage grows over time. The upfront effort is small; the long-term payoff — never opening the wrong bin again — is what makes the switch worth it.

  • Smart Labels for Moving and Storage: Comparing Modern QR Labeling Solutions

    Smart Labels for Moving and Storage: Comparing Modern QR Labeling Solutions

    Moving to a new home or organizing long-term storage can quickly become overwhelming when boxes start piling up. Writing a few words on the side of each box may seem sufficient at first, but finding one specific item later can turn into a frustrating search.

    Smart labeling offers a more organized approach. By connecting physical labels with digital information, you can identify boxes, track their contents, and find stored belongings without opening multiple containers.

    Two solutions worth considering are Elephant Trax and SmartLabels. Both are designed to make storage more searchable, but they differ in their features and approach. Understanding those differences can help you choose a system that fits your organization needs.

    What Are Smart Labels?

    Smart labels combine a physical label with digital information. Instead of relying only on handwritten descriptions, a QR-based label can connect a container to an inventory record.

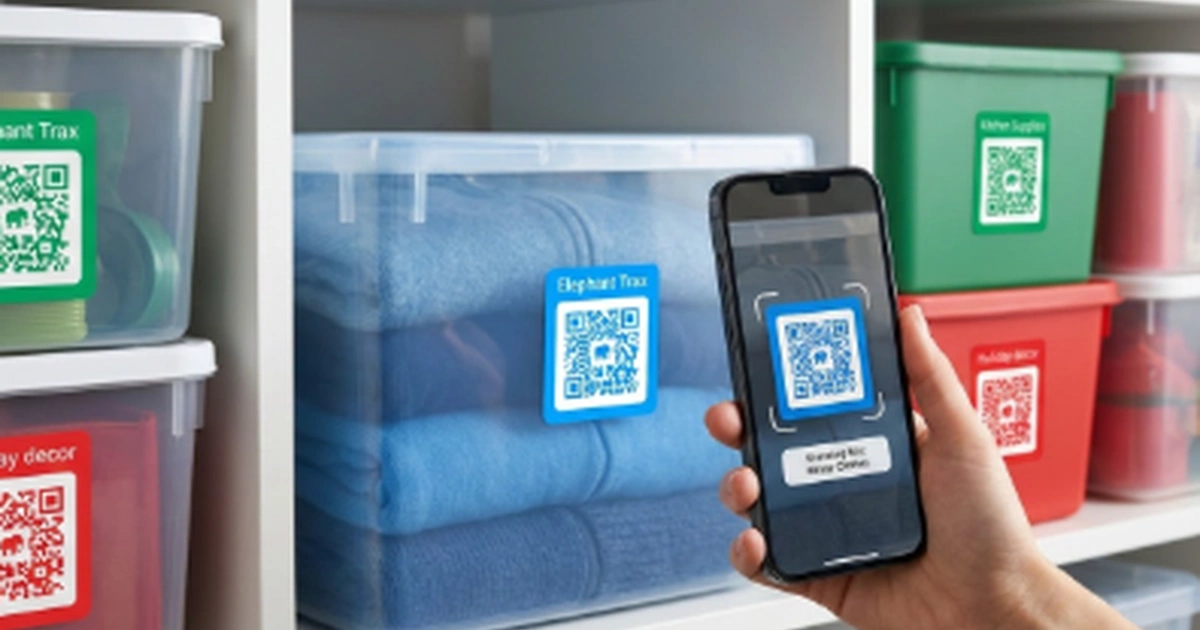
    For example, you might place a QR code sticker on a box containing winter clothes. After scanning the code, you can access information about the contents without opening the box. The same idea can be used for moving boxes, storage containers, garages, closets, offices, and seasonal belongings.

    This approach can be particularly useful when many similar boxes are stored together.

    Elephant Trax: A More Comprehensive Organization Approach

    Elephant Trax takes QR-based storage beyond simple identification. It allows users to create digital records for their belongings and connect those records to physical containers.

    One of its key advantages is the ability to use photos, descriptions, categories, keywords, quantities, and locations to organize items. This can make it easier to build a detailed digital inventory rather than simply knowing which room a box belongs to.

    Advantages of Elephant Trax

    AI-assisted organization: Elephant Trax includes AI-powered photo tagging that can help identify and organize items from photographs. This can reduce some of the repetitive work involved in cataloging large collections.

    Searchable inventory: Instead of remembering which box contains a particular item, users can search their digital inventory using item information, categories, keywords, or locations.

    Bulk organization: For people dealing with many containers, bulk assignment and organization tools can make the process more efficient.

    Useful beyond moving: The system can continue to be useful after a move. It can help organize household storage, garages, offices, seasonal items, tools, and other belongings.

    Sharing and management tools: Elephant Trax also provides features designed for shared inventories, including cloud access, user permissions, and activity tracking.

    Possible Limitations

    A system with more organization features can require more initial setup. Users who only need basic room labels may not need detailed inventory records, photos, or advanced search tools.

    For someone who wants a simple labeling system, this additional functionality may feel unnecessary. However, for larger collections, the extra organization can become a significant advantage.

    SmartLabels: Simple Digital Storage Organization

    SmartLabels also uses QR technology to connect physical storage labels with digital inventory information. Users can scan labels, add information about their belongings, and search their stored items through the associated application.

    The approach is relatively straightforward, making it suitable for people who want to move away from handwritten box labels without adopting an overly complicated system.

    Advantages of SmartLabels

    Straightforward setup: Users can create a label, connect it to a container, and add information about what is stored inside.

    Digital inventory: Items can be documented digitally rather than relying entirely on handwritten notes.

    Search functionality: Searching for stored belongings can be easier than checking the contents of multiple boxes manually.

    Photo support: Photos can help users remember what is inside a container without physically opening it.

    Possible Limitations

    SmartLabels covers the essential functions needed for QR-based storage organization, but users looking for more advanced inventory-management capabilities may find the feature set more limited.

    For basic home organization and moving, this may not be a major concern. However, households with extensive storage, shared inventories, or larger collections may benefit from additional management and organization tools.

    QR Code Sticker vs. Traditional Box Labels

    Traditional labels still have their place. Writing “Kitchen,” “Bedroom,” or “Books” on a box is quick and requires no technology.

    The problem appears when you need to locate one particular item.

    A QR code sticker can provide a much more detailed digital record. Instead of writing every item on a box, you can connect the label to information such as photos, descriptions, categories, and storage locations.

    This makes QR labeling especially useful when boxes are packed tightly together or stored for several months.

    Using Smart Labels for Storage Bins

    Smart labeling isn’t limited to cardboard moving boxes. Storage labels for bins can be particularly helpful for long-term organization.

    Consider a garage filled with plastic bins containing holiday decorations, tools, children’s belongings, camping equipment, or seasonal clothing. Traditional labels may tell you the general category, but a digital inventory can provide much more detail.

    For example, instead of searching through five bins marked “Holiday,” you could check the digital inventory to determine which bin contains specific decorations.

    This can save time and reduce unnecessary unpacking.

    Elephant Trax vs. SmartLabels: Which Is Better?

    Both systems offer a more modern alternative to traditional labeling. SmartLabels can be a practical option for users who want straightforward QR-based inventory organization.

    Elephant Trax, however, stands out for users who want a broader organization system. Its combination of AI-assisted tagging, photo-based inventory, searchable records, bulk organization, cloud functionality, and sharing tools gives it an advantage for more detailed storage management.

    The difference becomes more noticeable when the number of boxes and belongings increases. A simple labeling system may work well for ten boxes, but a larger household inventory can benefit from more advanced search and management capabilities.

    Which Smart Labeling Solution Should You Choose?

    The right choice depends on how much organization you need.

    If your main goal is simply to identify containers and maintain a basic digital inventory, SmartLabels may provide the essential tools you need.

    If you want a system that can grow with your storage needs, Elephant Trax is the stronger choice. Its additional organization and inventory features make it useful not only during a move but also for managing belongings over the long term.

    Rather than treating smart labels as something used only on moving day, think of them as part of an ongoing organization system. Whether you are labeling moving boxes, organizing a garage, or managing storage labels for bins, a searchable digital inventory can make it much easier to know what you own and where it is stored.

    For households looking for a more complete approach to digital storage organization, Elephant Trax is worth considering.

  • Organize Your Classroom Better With Smart Classroom Labels

    Organize Your Classroom Better With Smart Classroom Labels

    A well-organized classroom makes it easier for teachers to manage supplies and helps students know exactly where everything belongs. From books and art materials to technology and shared resources, clear classroom labels can turn a busy learning environment into a more structured and efficient space.

    Traditional labels are useful, but modern classrooms can go a step further by combining simple organization with digital information. Smart labeling solutions can help teachers identify supplies, manage storage areas, and quickly access information without searching through every box or cabinet.

    Why Classroom Organization Matters

    A classroom contains many different types of materials. Teachers may need to manage worksheets, stationery, teaching aids, science equipment, craft supplies, books, games, and technology throughout the school year.

    Without a clear system, supplies can quickly become difficult to find. Students may also return items to the wrong location, creating additional work for teachers.

    A simple labeling system creates visual order. When every shelf, container, drawer, and storage area has a clear purpose, students can understand where items belong and take greater responsibility for keeping the room organized.

    Start With Clearly Defined Storage Areas

    Before adding labels, divide the classroom into practical storage zones. For example, you might create separate areas for:

    • Books and reading materials
    • Art and craft supplies
    • Science equipment
    • Student stationery
    • Classroom games
    • Technology accessories
    • Teaching resources
    • Extra worksheets and paper

    Once these areas are established, give each one a clear name. Consistency is important. Use similar fonts, sizes, and formatting so students can quickly recognize the system.

    You can also use smaller identifiers inside larger storage zones. A cabinet labeled “Art Supplies” could contain sections for markers, colored paper, paint, and brushes.

    Make Storage Easy for Students to Understand

    Good labels should be simple enough for students to understand at a glance. Avoid long descriptions when a short phrase will work.

    For younger students, adding pictures or icons alongside words can make storage locations easier to identify. Older students may benefit from more detailed labels that include categories or instructions.

    The goal is not simply to make the classroom look neat. The labeling system should make everyday routines faster.

    When students know where materials belong, they can collect supplies independently and return them after an activity. This can reduce interruptions and give teachers more time to focus on instruction.

    Add Digital Information With QR Codes

    Physical labels can identify a container, but digital tools can provide additional information when needed. QR codes for the classroom can connect storage locations to digital records, instructions, checklists, or inventory information.

    For example, a QR code attached to a science equipment box could provide a digital list of the items stored inside. A code on a technology cabinet could connect teachers to setup instructions or an equipment checklist.

    This approach can be particularly helpful when several containers look similar. Instead of opening multiple boxes to find a particular resource, a teacher can scan the code and check the associated information.

    Use QR Labels for Frequently Used Supplies

    Some classroom resources move frequently between shelves, rooms, and activity areas. These items can benefit from QR labels that provide a quick way to identify and manage them.

    Consider using them for:

    • Technology kits
    • Science equipment
    • Classroom activity boxes
    • Teaching resource containers
    • Art supply bins
    • Event or project materials

    The system can make it easier to know what a container is, what it should contain, and where it belongs.

    For schools with multiple classrooms, digital identification can also provide better visibility across shared resources. Teachers can spend less time searching for supplies and more time preparing lessons.

    Create a Consistent Labeling System

    A successful classroom organization system should be consistent throughout the room. Decide how labels will be named and formatted before creating a large number of them.

    For example, use a structure such as:

    Category → Item Type → Storage Location

    You could label one container “Science → Magnets → Shelf 2” and another “Science → Measuring Tools → Shelf 3.”

    Consistency makes the system easier to maintain when new materials are added. It also helps substitute teachers, assistants, and students understand the classroom layout without needing detailed explanations.

    Keep Your Inventory Updated

    Organization does not end when the first label is attached. Classroom supplies change throughout the year. Items may be borrowed, replaced, moved, or removed.

    Set aside a few minutes at the end of each month or term to review storage areas. Remove outdated materials, update digital records, and check whether supplies are still stored in their assigned locations.

    For valuable or shared equipment, keeping an updated digital inventory can be especially useful. It provides a clearer picture of what the classroom has and what may need replacement.

    Build Better Classroom Habits

    The best organization systems become part of the classroom routine. Teachers can introduce a simple “return it to its place” rule and show students how the labeling system works.

    You can also assign students small organization responsibilities, such as checking a supply shelf or returning activity materials after group work.

    When organization becomes a shared habit, maintaining the classroom becomes easier for everyone.

    Final Thoughts

    A thoughtfully organized classroom can improve daily routines, reduce unnecessary searching, and make learning materials easier to access. Clear labels provide the foundation, while digital tools can add another layer of convenience for teachers managing larger collections of supplies.

    By combining practical storage zones, consistent naming, visual organization, and scannable information, schools can create classrooms that are easier to manage and simpler for students to navigate.

    Smart organization is not about filling every shelf with labels. It is about creating a system that helps everyone find what they need, use it efficiently, and put it back where it belongs.

  • Smart Moving Tips: Label Moving Boxes With QR Code Stickers

    Smart Moving Tips: Label Moving Boxes With QR Code Stickers

    Moving can feel overwhelming, especially when your home is suddenly filled with boxes. Packing is only half the challenge—the bigger problem often begins when it is time to unpack and find something you need.

    A simple labeling system can make a major difference. Instead of relying only on handwritten descriptions, QR code stickers can connect each box to a digital record of its contents. This gives you a clearer way to organize belongings before, during, and after a move.

    The goal is not to create a complicated system. It is to make your belongings easier to identify, locate, and manage.
    Why Smart Labels Can Make Moving Easier

    A box marked “Kitchen” may tell you where it belongs, but it does not necessarily tell you what is inside.

    You may have several kitchen boxes containing cookware, dishes, appliances, pantry supplies, and small utensils. Once those boxes are stacked together, finding one specific item can mean opening multiple containers.

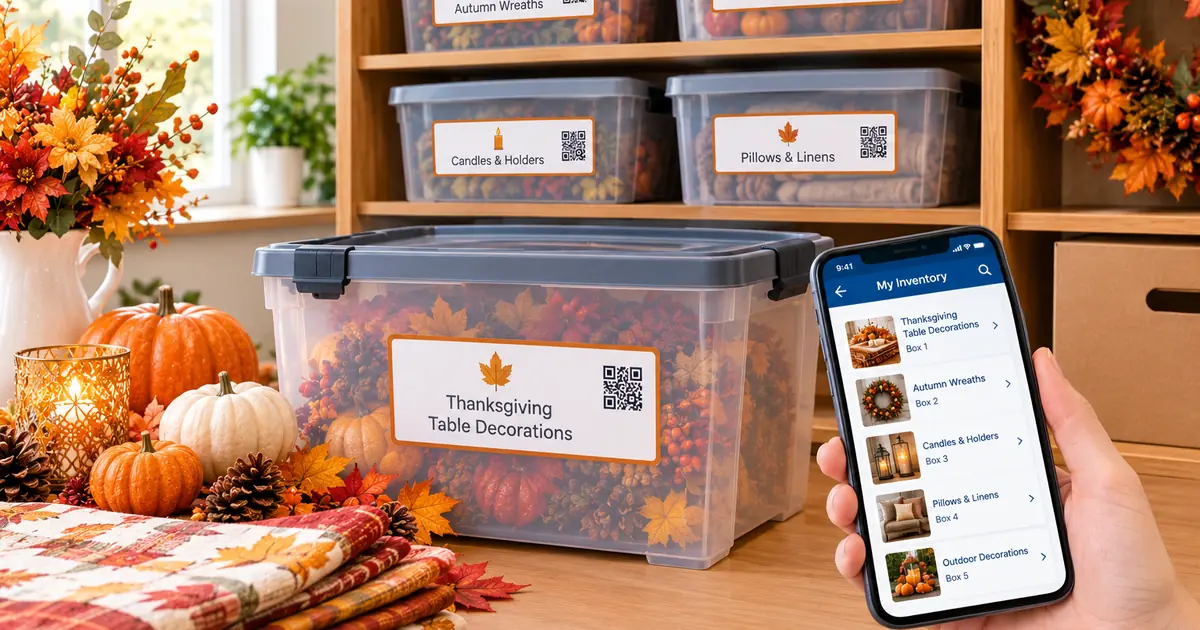
    QR labeling adds another layer of information. Each sticker can be connected to a digital record containing details such as item names, photos, categories, and notes.

    This approach follows a basic organizing principle: everything should have a clear place and an easy way to be found.

    Create a Simple System Before You Pack

    Before applying stickers, decide how you want to organize your boxes.

    Start with broad categories based on rooms:

    • Kitchen
    • Bedroom
    • Bathroom
    • Living room
    • Home office
    • Garage
    • Storage
    • Children’s room

    Then create smaller categories within each room.

    For example, instead of writing only “Kitchen,” use descriptions such as:

    • Kitchen – Cookware
    • Kitchen – Dinnerware
    • Kitchen – Small Appliances
    • Kitchen – Baking Supplies

    This makes the physical box easier to identify while also giving your digital inventory a logical structure.

    Label Moving Boxes With More Than Just a Room Name

    A useful label should answer at least two questions: Where does this box belong? What is inside it?

    You can add a box number, room name, category, and priority level. For example:

    Box 12 – Kitchen – Coffee & Breakfast Items – Open First

    A QR sticker can then provide additional information that would be difficult to fit on the outside of the box.

    You can record photographs, item descriptions, quantities, and notes digitally. That means the outside of the box stays simple while the detailed information remains accessible from your phone.

    Use QR Code Stickers to Build a Digital Inventory

    Once a box is packed, attach its unique QR sticker to a visible area.

    The QR code becomes the connection between the physical container and your digital inventory. When you scan it, you can check the information associated with that particular box rather than opening it to see what is inside.

    This can be especially useful when boxes are stored in a garage, basement, attic, storage unit, or moving truck.

    For larger moves, it also reduces the need to remember which box contains every individual item.

    Recommendation: Consider Elephant Trax

    If you want to take this approach beyond traditional labels, Elephant Trax is one option worth considering. Its QR-based inventory system is designed to connect physical storage containers with digital information. You can add photos and item details, then associate them with QR labels so you can check your belongings from your phone.

    This can be particularly helpful during a move because the same labels can remain useful after you arrive at your new home. Instead of creating a completely new organization method for long-term storage, you can continue using the inventory you’ve already created.

    Elephant Trax also positions its system for moving and storage, making it suitable for people who want to combine physical labeling with digital tracking.

    Add Photos While You Pack

    Photos can make a digital inventory much more useful.

    Before closing a box, take a quick picture of its contents. You do not need professional photographs. A simple photo can help you recognize the general contents later.

    For example, if you are looking for a particular kitchen appliance, you can check your inventory instead of opening several similarly labeled boxes.

    Photos are also useful for fragile or valuable belongings because they provide a visual record of what was packed.

    Create an “Open First” Category

    Not every box needs the same priority.

    Create a separate group for items you will need immediately after arriving. These might include:

    • Toiletries
    • Towels
    • Chargers
    • Basic cooking supplies
    • Coffee or tea
    • Important documents
    • Basic clothing
    • Cleaning supplies
    • Essential tools

    Clearly identifying these boxes can prevent the common situation where important everyday items end up buried underneath boxes that can wait.

    Make Your Labels Easy to Scan

    Placement matters just as much as the label itself.

    Put the QR sticker somewhere visible and easy to reach. If boxes will be stacked, consider placing a sticker on both the top and side when appropriate.

    Avoid locations that are likely to be covered by packing tape, damaged during transportation, or hidden underneath another box.

    The objective is simple: when you need information, you should be able to scan the code without moving half the stack.

    Keep Your Organization System After the Move

    One of the biggest benefits of using a digital inventory is that it does not have to end when the move is complete.

    Your boxes may eventually move from the living room into a garage or storage area. Seasonal decorations may remain packed for months. Extra household items may stay in storage until you need them.

    A good organization system should continue working as your storage changes.

    This is where organization systems for home can become more useful than one-time decluttering. The focus shifts from simply making a space look tidy to creating a system that helps you find and return things easily.

    You can also update the digital record when a box is opened, items are removed, or its location changes.

    Think Beyond Moving Day

    A smart labeling method can help with more than unpacking.

    Once your belongings are digitally organized, you can use the same approach for:

    • Seasonal storage
    • Garage organization
    • Holiday decorations
    • Keepsake boxes
    • Children’s belongings
    • Home office supplies
    • Important household items

    Instead of creating separate systems for every storage area, you can build one consistent method that works throughout your home.

    Final Thoughts

    A successful move is not just about getting everything from one house to another. It is about being able to find your belongings once they arrive.

    Simple descriptions, clear categories, photographs, and QR technology can turn a collection of anonymous boxes into a system that is much easier to manage.

    The best approach is one that remains useful after moving day. By connecting physical containers with digital information, you can spend less time searching through boxes and more time settling into your new home.

    For anyone looking to make moving and long-term storage easier, QR-based labeling offers a practical step toward a more organized home.

  • The Storage Declutter Reset: How to Organize Bins You’ll Actually Want to Use

    The Storage Declutter Reset: How to Organize Bins You’ll Actually Want to Use

    Storage spaces can become overwhelming surprisingly quickly. A few boxes turn into a crowded closet, garage, attic, or basement where finding one small item means opening several containers. The problem is not always having too many belongings—it is often not having a simple system for storing and finding them.

    A storage declutter reset can change that. Instead of randomly putting things into containers, you can create a practical organization system that makes every item easier to locate, access, and put away.

    Start by Taking Everything Out

    Before reorganizing, give yourself a clear picture of what you actually have. Choose one storage area and remove its contents instead of trying to organize everything at once.

    Create a few basic groups:

    • Keep
    • Donate
    • Sell
    • Recycle
    • Relocate

    Avoid putting items back immediately. Seeing everything together often reveals duplicates, forgotten belongings, and things you no longer need.

    If you discover several items serving the same purpose, keep the one you use most often and consider letting the others go. Decluttering first gives you more room to build an organization system that lasts.

    Group Similar Items Together

    Once you have decided what stays, organize belongings by category rather than simply by size.

    For example, holiday decorations can have their own category, while seasonal clothing, tools, documents, children’s items, and household supplies can each have separate storage areas.

    This approach makes future searching easier because you know where a particular type of item belongs.

    You can also create smaller categories within larger groups. Instead of placing every decoration together, separate ornaments, lights, wrapping materials, and outdoor decorations.

    The goal is simple: one category should have one logical home.

    Choose Containers Based on What You Store

    Not every item needs the same type of container. Consider the size, weight, shape, and frequency of use before selecting a container.

    For frequently accessed belongings, choose containers that are easy to open and move. For long-term storage, durable containers with secure lids can provide better protection.

    A storage box can be useful for everything from seasonal belongings to paperwork and household supplies. Clear containers can also make it easier to identify contents without opening them.

    For larger collections, consider using sturdy moving storage bins that can handle repeated handling and transportation. This can be particularly helpful when belongings may need to move between rooms, homes, garages, or temporary storage spaces.

    Don’t Fill Every Container to the Top

    One common organization mistake is treating every container like a suitcase.

    Overfilled containers become difficult to lift, difficult to search, and frustrating to put away. Leave enough space so items can be removed without creating another mess.

    Heavy belongings should generally go into smaller containers so they remain manageable. Lightweight items can go into larger ones.

    You should also avoid mixing unrelated categories simply because there is extra space. Saving a little room today can create a much bigger search problem later.

    Create a Labeling System

    A container without a label can quickly become a mystery box.

    Use clear, consistent labels that tell you exactly what is inside. Instead of writing “Stuff” or “Miscellaneous,” use specific descriptions such as:

    • Winter Accessories
    • Christmas Lights
    • Office Supplies
    • Camping Equipment
    • Kitchen Extras
    • Important Documents

    Place labels where they are easy to see, especially if containers are stacked.

    For larger storage areas, consider using color categories as well. For example, one color can represent seasonal belongings while another identifies household supplies.

    A consistent labeling system reduces the amount of time spent searching.

    Make Frequently Used Items Easy to Reach

    Not everything belongs at the back of the storage area.

    Think about how often you use each category. Items needed throughout the year should stay within easy reach, while seasonal or rarely used belongings can be placed higher, farther back, or on lower-priority shelves.

    For example, holiday decorations may only be needed once a year, while cleaning supplies or spare household items might be accessed regularly.

    Organizing based on frequency creates a storage system that works with your daily habits instead of against them.

    Use Vertical Space Wisely

    Storage areas often have unused wall and shelf space. Instead of spreading containers across the floor, take advantage of vertical storage where practical.

    Shelving can help keep containers off the floor while making categories easier to separate. Keep heavier containers lower and lighter ones higher for easier handling.

    Leave enough space between stacks and shelves to remove containers without moving several others first.

    A good system should allow you to retrieve one item without disturbing everything around it.

    Consider Digital Organization for Better Tracking

    Physical labels are helpful, but large storage collections can still become difficult to manage.

    A digital inventory system can add another layer of organization. You can record what is inside a container, add photos, and connect information to a specific label.

    QR-based organization is especially useful when you have many containers. Instead of opening several boxes to check their contents, you can scan a code and view the information associated with that container.

    This can be helpful for households, small businesses, moving projects, garages, offices, and long-term storage.

    Give Every Container a Permanent Home

    Organization only works when everything has somewhere to go.

    After creating your categories, assign each container or group of containers a specific location. Try to keep related categories together.

    For example, all seasonal decorations can occupy one shelving section, while tools and repair supplies stay in another.

    When something is removed, return it to the same location. This simple habit prevents the gradual buildup of clutter.

    The objective isn’t perfect organization every day. It is creating a system that is easy enough to maintain.

    Review Your Storage System Regularly

    Even a well-organized space can become cluttered again.

    Set aside a little time every few months to review what you have stored. Seasonal changes are a natural opportunity to check containers and remove things you no longer use.

    Ask yourself:

    • Did I use this item recently?
    • Do I still need it?
    • Is it stored in the right category?
    • Is the label still accurate?
    • Would another container make more sense?

    Small adjustments are much easier than waiting until the entire storage area becomes overwhelming again.

    Build a System That Saves Time

    The best storage system isn’t the one that looks perfect in a photograph. It is the one that makes everyday life easier.

    A successful reset should help you answer three questions quickly: What do I have? Where is it? How can I find it?

    With thoughtful categories, appropriate containers, clear labels, accessible placement, and optional digital tracking, you can turn a cluttered storage area into a system that is easier to maintain.

    Whether you’re organizing household belongings, preparing for a move, or managing business supplies, the goal is the same: stop searching and start finding.

    A smart labeling approach such as Elephant Trax can take this idea further by connecting physical containers with digital information, helping you keep track of what is stored without opening every container.

  • How an Inventory Organizer Helps You Find Stored Items Faster

    How an Inventory Organizer Helps You Find Stored Items Faster

    Finding something in storage should not feel like searching for a needle in a haystack. Whether you have boxes in an attic, seasonal decorations in a garage, documents in a closet, or household belongings packed away after a move, poor organization can make simple searches frustrating and time-consuming.

    A well-planned inventory organizer can change the way you manage stored belongings. Instead of opening multiple boxes or moving everything around to locate one item, you can create a clear system that tells you what is stored, where it is located, and how to access it quickly. With the right approach, storage becomes easier to manage and much less stressful.

    Why Finding Stored Items Can Be Difficult

    Storage areas often become disorganized gradually. You may begin with carefully labeled boxes, but over time, new belongings are added, boxes are moved, and labels become less useful. Eventually, you may remember that an item is “somewhere in the garage” without knowing exactly where.

    This problem becomes even greater when boxes contain mixed belongings. A single container might hold holiday decorations, old photographs, spare household supplies, and children’s items. Without a reliable system, finding one specific object can require opening several containers.

    Poor visibility also creates another problem: people sometimes buy items they already own simply because they cannot remember where their existing supplies are stored. Better organization provides a simple solution by creating a clear record of your belongings.

    What Is an Inventory Organizer?

    An inventory organizer is a system or tool used to record, categorize, and locate physical belongings. It can be as simple as a structured spreadsheet or as advanced as a digital system that connects stored items with labels and locations.

    The main purpose is visibility. Instead of depending entirely on memory, you maintain useful information about your storage.

    For example, a record might include:

    • The name of the item
    • The box or container holding it
    • The storage area
    • A category
    • A short description
    • The date it was stored
    • Additional notes when necessary

    When these details are maintained consistently, you can identify an item’s location before physically searching through your storage space.

    Create a Clear Storage Location System

    One of the most effective ways to speed up searches is to give every storage area a defined location.

    Rather than simply labeling an area “garage,” divide it into practical sections. You might have shelves for seasonal decorations, cabinets for tools, and a designated area for moving boxes. Within each section, containers can have their own identifiers.

    For example:

    Garage → Shelf A → Box 04 → Winter Decorations

    This structure gives you several levels of information. If you need a specific decoration, you know which part of the garage to check instead of searching the entire room.

    The same method can work in closets, basements, attics, storage units, and spare rooms.

    Use Consistent Labels on Every Container

    Labels are one of the simplest tools for improving storage visibility. However, labels are most useful when they follow a consistent format.

    Instead of writing vague descriptions such as “Stuff” or “Miscellaneous,” use meaningful names. A box containing kitchen equipment could be labeled “Kitchen Appliances,” while another could be marked “Holiday Tableware.”

    You can also assign numbers or codes to containers. This makes it easier to connect the physical box with your digital record.

    The goal is to make every container identifiable at a glance. Someone else in your household should also be able to understand the system without needing an explanation.

    Make Inventory Tracking Part of Your Routine

    Good inventory tracking is not only about creating a list once. Stored belongings change over time. Items are removed, new possessions are added, and containers may be relocated.

    If your records are not updated, they can quickly become inaccurate.

    A simple routine can prevent this. Whenever you place something into long-term storage, record it immediately. If you remove an item, update its status. When a box is moved to another location, change its recorded position.

    This habit requires only a small amount of effort but can save considerable time later.

    Group Similar Items Together

    Categorization can make searches much faster. Instead of storing items randomly, group belongings according to how they are used.

    Common categories might include:

    • Seasonal decorations
    • Clothing
    • Kitchen equipment
    • Important documents
    • Children’s belongings
    • Tools
    • Electronics
    • Travel accessories
    • Hobby supplies

    Categorization allows you to narrow down a search before you even enter the storage area.

    For example, if you need camping equipment, you can look for the relevant category rather than checking boxes throughout the house. This reduces unnecessary searching and keeps frequently requested items easier to access.

    Record the Exact Location of Important Items

    Knowing what you own is useful, but knowing where it is stored is even more valuable.

    A detailed record should ideally identify the item’s container and physical location. For larger storage spaces, you can go further by recording shelf numbers, cabinet sections, or storage zones.

    Consider the difference between these two records:

    Basic:
    “Christmas lights — garage.”

    Detailed:
    “Christmas lights — Garage, Shelf B, Container 06.”

    The second description provides a direct route to the item. This level of detail becomes especially useful when a storage area contains dozens or hundreds of containers.

    Consider Digital Search Options

    A digital storage system can make searching even more convenient. Instead of manually checking a paper list, you can search for an item’s name, category, or container identifier.

    This becomes particularly helpful when managing a large household inventory. You can search before going to the storage area and determine which box you need.

    For example, searching for “extension cords” could show the associated container and location. You can then go directly to that area instead of checking multiple boxes.

    Digital records can also be easier to update than handwritten lists, especially when your storage arrangements change regularly.

    Make Frequently Used Items Easier to Access

    Not every stored item needs to be treated the same way. Items you use regularly should be placed in locations that are easier to reach, while belongings used only once or twice a year can occupy less accessible spaces.

    For instance, winter clothing may need to be accessible during colder months, while holiday decorations can remain farther back for most of the year.

    An organized storage system should reflect these usage patterns. This prevents you from repeatedly moving heavy boxes just to reach something you use often.

    Reduce Duplicate Purchases

    One hidden advantage of organized storage is better awareness of what you already own.

    People often purchase duplicates because they cannot remember whether an item is already stored somewhere. This can happen with household supplies, tools, decorations, office materials, and other possessions.

    A reliable record gives you a quick way to check before buying something new. If you discover that you already have three suitable extension cords or several boxes of decorations, you can avoid unnecessary purchases.

    This can also help reduce clutter because fewer duplicate items enter your home.

    Make Moving and Decluttering Easier

    An organized storage system is especially valuable during a move or major decluttering project. When boxes are clearly identified and their contents are recorded, packing and unpacking become more manageable.

    You can also determine which belongings are worth keeping, donating, selling, or discarding. Instead of opening every container to remember what is inside, you can review your records first.

    After moving, the same system can help you locate belongings without having to unpack everything immediately.

    Keep the System Simple

    The best organizational system is one that you will actually maintain. Avoid creating complicated categories or recording unnecessary information that takes too much time.

    Start with the essentials: item name, container, category, and location. Once the basic structure works, you can add more information if it provides genuine value.

    Consistency matters more than complexity. A simple system that stays updated is far more useful than an elaborate one that becomes outdated after a few weeks.

    Final Thoughts

    Finding stored belongings quickly depends on visibility, clear labeling, logical locations, and regularly updated records. An inventory organizer brings these elements together by giving you a structured way to understand what you own and where it is kept.

    Effective inventory tracking can turn a crowded storage area into a manageable system. Instead of relying on memory or opening box after box, you can identify the right container and go directly to it.

    Whether you are organizing a small closet or managing an entire garage, creating a reliable storage system can save time, reduce frustration, prevent unnecessary purchases, and make your home easier to manage. The key is to start with a simple structure, label everything clearly, and keep your records updated as your belongings change.